To replace a cane chair seat, remove the old cane, measure the seat dimensions, purchase a new pre-woven cane sheet, and secure it tightly onto the seat frame using a spline and wedge. Trim excess cane for a neat finish.
In this blog post, we’re delving into the world of cane chair restoration. Cane chairs, with their intricate weaves and timeless appeal, add charm to any home decor. However, over time, the cane seat may wear out and require replacement. Fear not; this is a DIY project you can tackle at home with a little patience and the right tools. We’ll guide you through a step-by-step process on how to replace a cane chair seat, breathing new life into your beloved piece of furniture. Let’s get started!
Preparing For The Replacement
The replacement of a cane chair seat requires a careful examination of the chair and the assembly of necessary tools and materials. Here’s a detailed guide to help you through this process:
Assessing the Chair
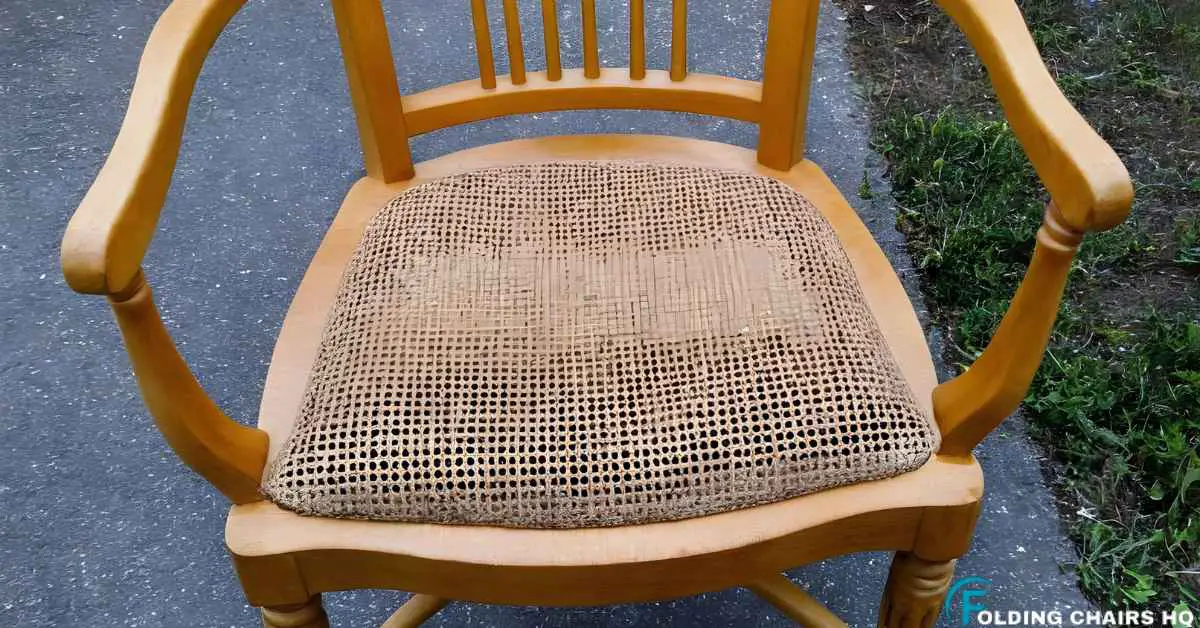
Begin by examining the chair. Take note of the method used in the previous caning, which is typically the Pressed Cane Method. Determine the extent of the damage and identify the parts that need replacement. For a detailed look, consider using a magnifying glass.
Gathering Tools and Materials
This task requires specific tools and materials. Follow the list below to gather everything you need:
- Chair Caning Supplies: A new seat, typically a pre-woven cane, which is best suited for the chair.
- Cane and Chair Prep: Wood and supplies to prepare the chair for replacement.
- Soaked Replacement Seat: This is a pre-woven cane that should be soaked in water before use.
Ensure you have a workspace ready with all the tools and materials at hand.
Preparing the Chair
Start by scrubbing off the old varnish or paint on the chair. Then, carefully remove the broken seat. The surface should be clean and ready for the Soaked Replacement Seat.
With the old seat removed, you’re set to start replacing the cane chair seat. Follow the instructions carefully, and take your time to ensure a perfect finish.
Removing The Old Cane Seat
Completing a DIY project, such as replacing a cane chair seat, can bring a huge sense of achievement. The first step in this process involves removing the old cane seat. This guide will provide step-by-step instructions on how to successfully remove the old cane seat from a chair.
Removing the Seat Frame
The process of removing the seat frame is crucial to the seat replacement process. Follow the steps below:
- Turn the chair upside down.
- Locate the screws holding the seat frame in place.
- Use a screwdriver to remove these screws.
- Carefully lift out the seat frame.
Handle the frame with care to avoid causing any damage.
Detaching the Cane
After the frame is removed, it’s time to detach the old cane. This task might require some patience due to the intricate nature of the cane weave.
- Use a utility knife to cut along the inside edge of the seat groove.
- Gently pull out the cut pieces of cane.
- Ensure not to damage the chair grooves.
With the cane seat now removed, your chair is ready for a fresh new cane replacement seat. The subsequent steps in the DIY project will involve installing the webbing into the chair grooves and applying the spline. This will give your chair a new lease of life and add aesthetic appeal to your furniture.
Measuring And Cutting The New Seat
Transforming your cane chair with a new seat is an exciting DIY task. Let’s delve into the critical steps: measuring the seat and cutting the new cane.
Taking Seat Measurements
Accurate measurements are the backbone of a perfect fit. A tape measure will be your key tool.
- Start by removing the old cane seat. Be careful to avoid damaging the chair.
- Next, measure across the chair’s width. This is the distance from one side of the seat to the other.
- Lastly, measure the chair’s depth. This is the distance from the front to the back of the chair.
Make sure to jot down each dimension so you won’t forget!
Cutting the New Cane
Now, it’s time to bring in the new cane. Sharp tools are essential for clean cutting.
- Refer to your measurements: Be sure to add an extra inch on each side for allowances.
- Mark with a pencil: On the new cane, mark out your measurements. This will be your cutting guide.
- Cut with precision: Using your marked outlines, start cutting the cane. Use sharp shears for this.
At the end of the process, you will have your new cane, cut to size, ready to install. This will give your chair a fresh new look and feel.
Attaching The New Cane Seat
Restoring a cane chair by attaching a new cane seat is a crucial task. It requires precision, hard work, and patience. The process of securing, weaving, and finishing the cane seat can transform an old, worn-out chair into a stylish piece of furniture.
Securing the Cane Weaving
- Start by positioning the pre-woven cane sheet on the chair seat. Ensure that the shiny side faces up and the grooves align perfectly.
- Use a wooden wedge to push the cane into the chair’s groove. A tight fit is important. Do this gradually, being careful not to tear the cane.
- Secure the cane with a reed spline. The reed spline holds the cane firmly in the chair’s groove, preventing any movement.
Trimming and Finishing
After securing the cane, begin the trimming process. Trim off any excess cane sticking out of the grooves. Use a utility knife for a clean cut, but proceed with caution to avoid damaging the chair or the seat.
The final step involves staining and sealing. Apply a matching stain to give the new cane seat a natural look. It also protects the cane from dirt and spills. After the stain dries, apply a thin, clear coat of sealer to protect the cane seat from wear and tear.
Replacing a cane chair seat can breathe new life into a beloved piece of furniture. With patience and precision, you will surely achieve a rewarding end product.
Finalizing The Replacement
With your cane seat expertly woven, it’s time to put the final touches on your chair restoration project. Ensure everything is secure, comfortable, and visually appealing. Follow these steps to enjoy your newly revived piece of furniture.
Reattaching the Seat Frame
Take the dry, sturdy seat frame and align it with the chair’s base. Use wooden wedges if needed to ensure a snug fit. Fasten the frame with screws or nails, depending on your chair’s design. Tighten all attachments so the frame doesn’t wobble or creak.
Testing and Making Adjustments
Before declaring your project complete, conduct some tests.
- Sit gently on the chair to feel for any give or discomfort.
- Inspect the placement of the seat cover – it should be even and taut.
- Look closely at all connections to confirm they are tight and secure.
If you notice any issues, make the necessary adjustments. Perhaps tighten a screw or refit a wedge. Ensure everything is just right for a comfortable seat. This will ensure that your chair is not only functional, but also a beautiful piece of furniture. Enjoy your newly restored cane chair!
Frequently Asked Questions (FAQs)
Q1: What is a cane chair?
A cane chair is a type of chair that uses woven cane for the seat and sometimes the backrest. Cane is a flexible and durable material derived from the rattan vine, making it an excellent choice for furniture.
Q2: Why should I replace my cane chair seat?
Over time, cane chair seats can wear out or become damaged. Replacing the seat can restore the chair’s functionality and appearance.
Q3: What is the pressed cane method?
The pressed cane method involves using a pre-woven sheet of cane that is pressed into a groove on the chair frame and held in place with a reed spline.
Q4: What supplies do I need to replace a cane chair seat?
You’ll need a new pre-woven cane seat, a reed spline, a utility knife, a chisel, a hammer, and wood glue.
Q5: How do I prepare the chair for the replacement process?
First, remove the old cane and spline from the chair. Then, clean the groove and let it dry before starting the replacement process.
Q6: How do I install the webbing into the chair grooves?
You’ll need to cut the pre-woven cane to size, soak it in water to make it flexible, then press it into the groove using a wooden wedge or similar tool.
Q7: What is a spline, and how do I apply it?
A spline is a thin strip of reed that holds the cane in place in the groove. After the cane is installed, apply wood glue to the groove and press the spline into it.
Q8: Are there alternatives to cane seats?
Yes, one popular alternative is an upholstered seat, which can be more comfortable and customizable than a cane seat.
Conclusion
In this blog post, we’ve walked through the process of replacing a cane chair seat, a rewarding DIY project that breathes new life into your furniture. This task requires careful assessment, precise measurements, and meticulous workmanship. Each step, from removing the old seat to attaching the new one, is crucial to achieving a perfect finish. With patience and attention to detail, you can transform an old, worn-out chair into a stylish and comfortable piece of furniture. Enjoy the satisfaction of sitting on a chair that you’ve restored with your own hands! This not only gives you a sense of accomplishment but also preserves a piece of furniture that might hold sentimental value. Happy restoring!
Your feedback matters! Please take a moment to leave your ratings and comments below. Your input will help us improve our guide.